
The Diffuse material is used for dull, non-reflecting materials or light emitting surfaces (figure 1). The parameters for the Diffuse material can be edited in the Materials tab of the OctaneRender Setup window. This section describes each parameter (figure 2).
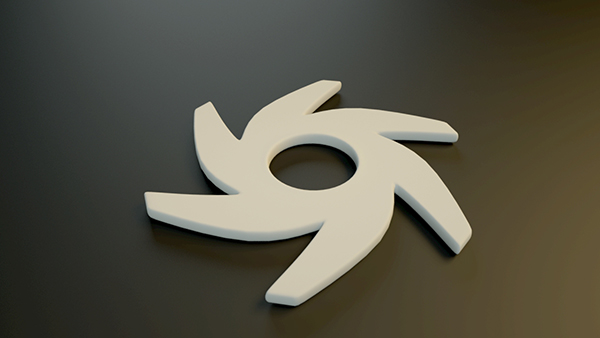
Figure 1: An object rendered using the Diffuse material.
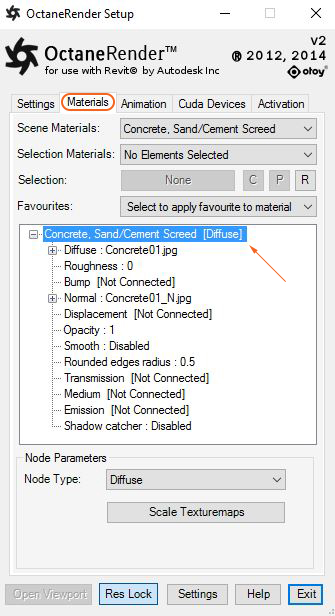
Figure 2: The parameters for the Diffuse material.
Diffuse Material Parameters:
Diffuse
The Diffuse parameter gives the material its color. In computer graphics this is also referred to as “Base Color” or “Albedo”. Diffuse color can be can set using the color picker or by connecting a texture (procedural or image-based).
Roughness
The Roughness parameter determines the spread of highlights on the surface. A high roughness value or light color can be used to simulate very rough surfaces such as sand paper or clay. Roughness can be can set using the color picker or by connecting a texture (procedural or image-based).
Bump
The Bump parameter is used to create fine details on the material’s surface using a procedural or image texture. Typically a gray-scale texture is connected to this parameter, light areas of the texture give the appearance of protruding bumps, dark areas create the appearance of indentation. The strength of the bump map can be adjusted by setting the Power or Gamma values on the Octane image texture node. These attributes are covered in more detail under the Texture Overview category.
Normal
The Normal parameter is also used to create the look of fine detail on the surface. A normal map is a special type of image texture that uses red, green, and blue color values to perturb the normals of the surface at render time thus giving the appearance of added detail. They can be more accurate than bump maps but require specific software, such as ZBrush, Mudbox, Substance designer, Xnormal, or others to generate.
Displacement
The Displacement parameter adjusts the height of the vertices of a surface at render time using an image texture map. Displacement maps differs from Bump or Normal maps in that the geometry is altered by the texture as opposed to just creating the appearance of detail. Displacement mapping is more computationally expensive than using a bump or normal map but the results can be more realistic especially along the silhouette of the surface. Displacement mapping is covered in more detail under the Texture Overview category.
Opacity
The Opacity parameter determines which parts of the surface are visible in the render. Dark values indicate transparent areas, light values determine opaque areas. Values in between light and dark create the look of semi transparent areas. You can lower the opacity value to fade the overall visibility of an object or use a texture map to vary the opacity across the surface. For example if you wanted to make a simple polygon plane look like a leaf you would connect a black and white image of the leaf’s silhouette to the opacity channel of the diffuse shader.
Smooth
The Smooth parameter is a Boolean (meaning that it is a toggle that turns the feature on or off) which smooths the transition between surface normals. If this option is disabled the edges between the polygons of the surface will be sharp giving the surface a faceted look.
Rounded Edges Radius
The Rounded Edges parameter bevels the edges of the surface at render time automatically without the need to alter or subdivide the geometry. Using this option can enhance the realism of objects by eliminating overly sharp edges. The value refers to the radius of the rounded edge. Higher values for this setting produce rounder edges.
Transmission
The Transmission parameter uses a color or texture that is then mixed with the material’s Diffuse color and is most noticeable in areas affected by indirect lighting.
Medium
OctaneRender for Revit has two types of mediums: absorption and scattering, which can be used to create translucent surfaces. To use these options the medium input of the Diffuse material needs to be connected to either the Absorption or Scattering medium nodes.
- Absorption Medium produces the appearance of a material that absorbs light while passing through a surface. The color resulting from this absorption depends on the distance light travels through the material. The Absorption map type is covered in more detail under the Texture Overview category.
- Scattering Medium similar to the absorption medium but with an additional option that can be used to simulate subsurface scattering. Subsurface scattering is the phenomena that gives human skin, and similar organic surfaces, their characteristic “glow” under certain lighting conditions. It is a major component in creating the look of realistic skin. The Scattering map type is covered in more detail under the Texture Overview category.
Emission
The Emission parameter is used to create a surface that emits light (also known as a “mesh emitter”). To use this option the Emission input of the Diffuse material must be connected to either a Blackbody or Texture emission node. These nodes are covered in more detail under the Texture Overview category and in Mesh Emitters under the Lighting Overview category.
Shadow Catcher
This is a Boolean option that converts the material into a shadow catcher. This means that when it is active the surface will only be visible in the areas that are in shadow, all other areas will be transparent in the render.
Comments
0 comments
Please sign in to leave a comment.